Padlet
| Site: | Hampshire Participation and Lifelong Learning |
| Course: | Digital Learning Workshops |
| Book: | Padlet |
| Printed by: | Guest user |
| Date: | Sunday, 14 December 2025, 12:36 AM |
Description
Padlet is a collaborative
bulletin board tool that allows teachers and students to share ideas and
resources. It has a wide range of functionality and can allow users to share
comments, links, YouTube videos, files, images,
What is Padlet
Padlet is a virtual pinboard or online post-it board with a unique URL. The interface is straightforward, with customisable layouts, and backgrounds, plus some nice features to increase learner engagement. As well as learners being able to upload a range of media (text, video, audio etc) they can also comment on other posts. There are customisable settings which mean participants can upvote, like, or even give a score for other posts. You can choose whether to moderate posts before they are published, allow participants to post anonymously, and there’s a profanity filter (if required). It is also possible to set privacy levels for boards and assign moderators if you think it’s necessary.

With a free Padlet account, you can create up to 3 walls. You can download your walls in a variety of formats after using them with learners, meaning that you could recycle the walls for different cohorts.
How to Create a Padlet 1
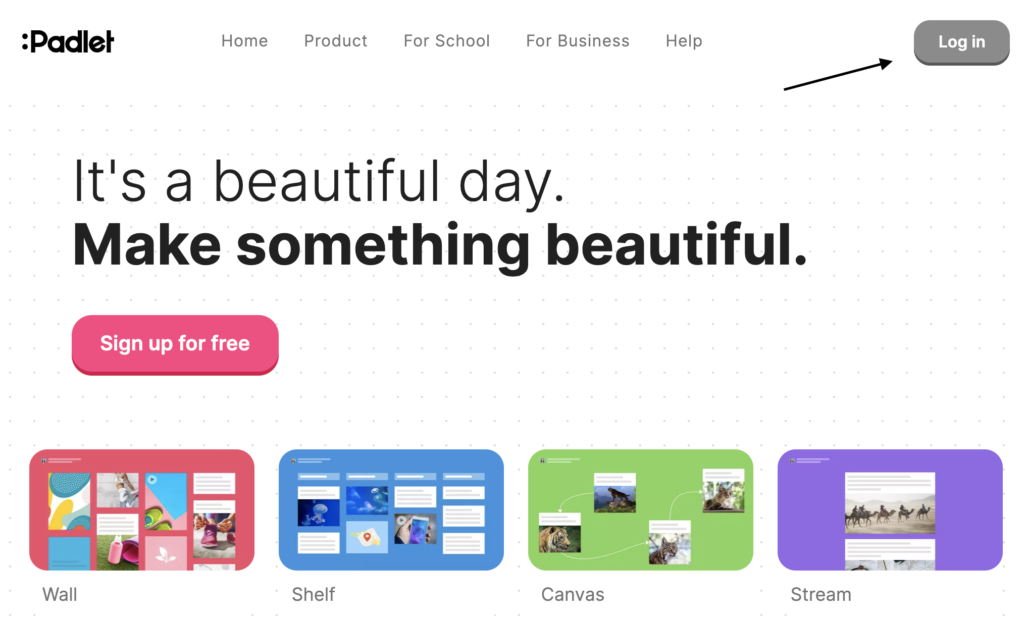
To get started with Padlet, navigate to www.padlet.com in your browser and click “log in.” If you are yet to create an account click on "sign up for free".
Please note that you’ll be limited to 3 padlets at one time. (This can be managed by downloading padlets as pdfs or archiving them to preserve them which we will cover later).
How to Create a Padlet 2
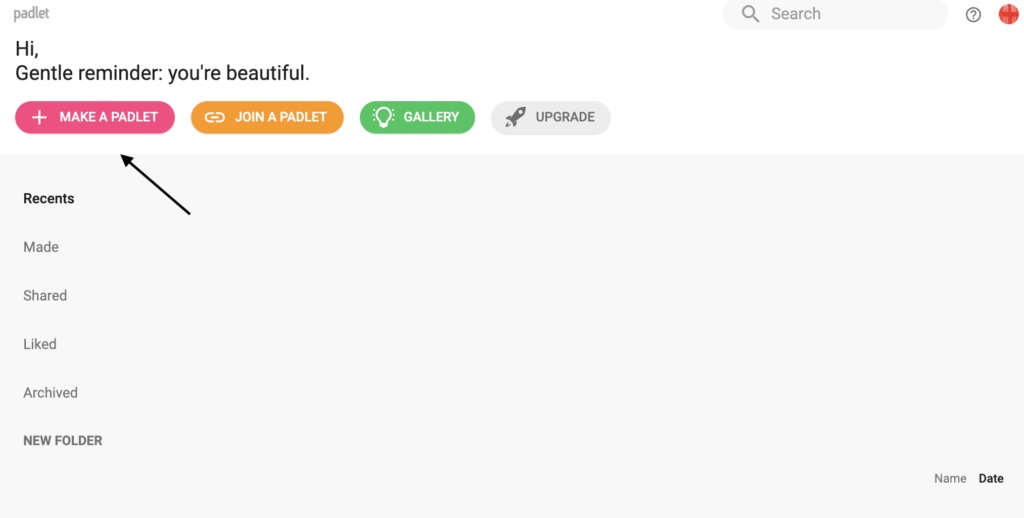
Once you log in, you’ll arrive at the Padlet dashboard. To create your first Padlet, click on “make a padlet.”
How to Create a Padlet 3
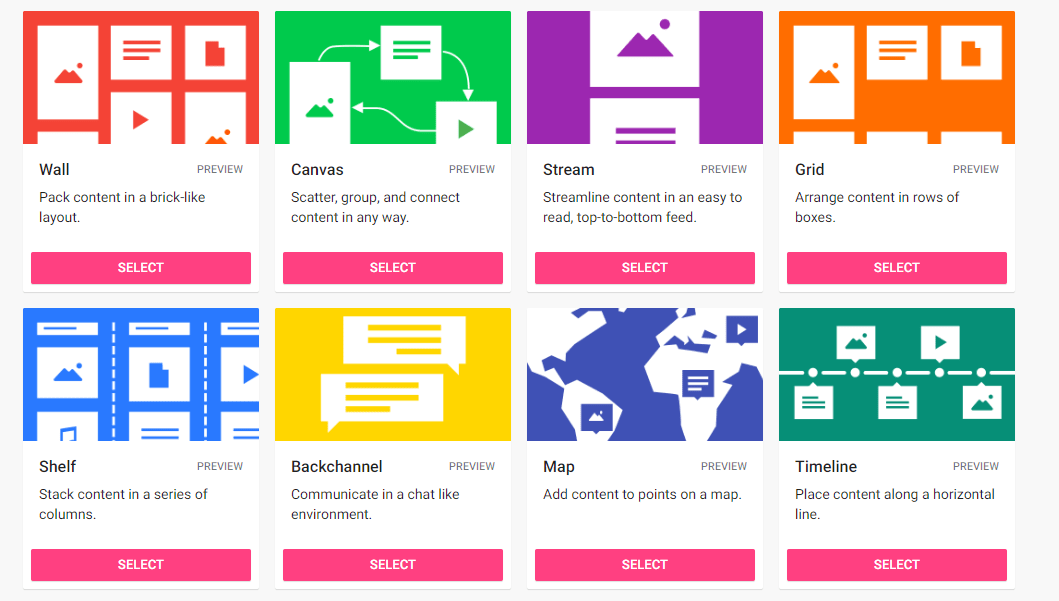
Here you’ll see the various templates available to create a padlet: wall, canvas, stream, grid, shelf, backchannel, map and timeline. Each has its own uses which are worth spending time exploring. For the purposes of this tutorial, we will focus on creating a grid which arranges content in rows or boxes.
How to Create a Padlet 4
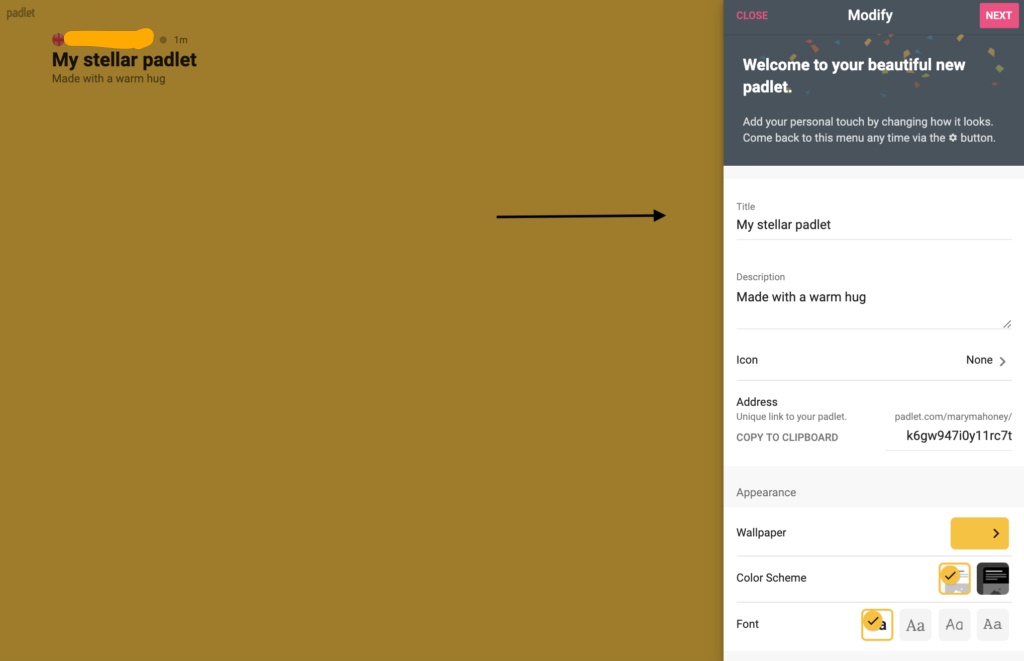
After selecting “Grid,” you’ll be invited to enter some descriptive information about your padlet including a title and description. You can also create a unique link to the padlet if you are going to keep it public. Designers can also customise the appearance of a padlet by selecting a wallpaper and color scheme from available templates, or providing a custom look
How to Create a Padlet 5
Scrolling down in this window, you will see a heading called “Posting.” These are important customise fields that allow the instructor to control how learners will interact with the padlet. Will learners be asked to post anonymously, or with their names attached? Will learners be asked to comment on content posted on the board?
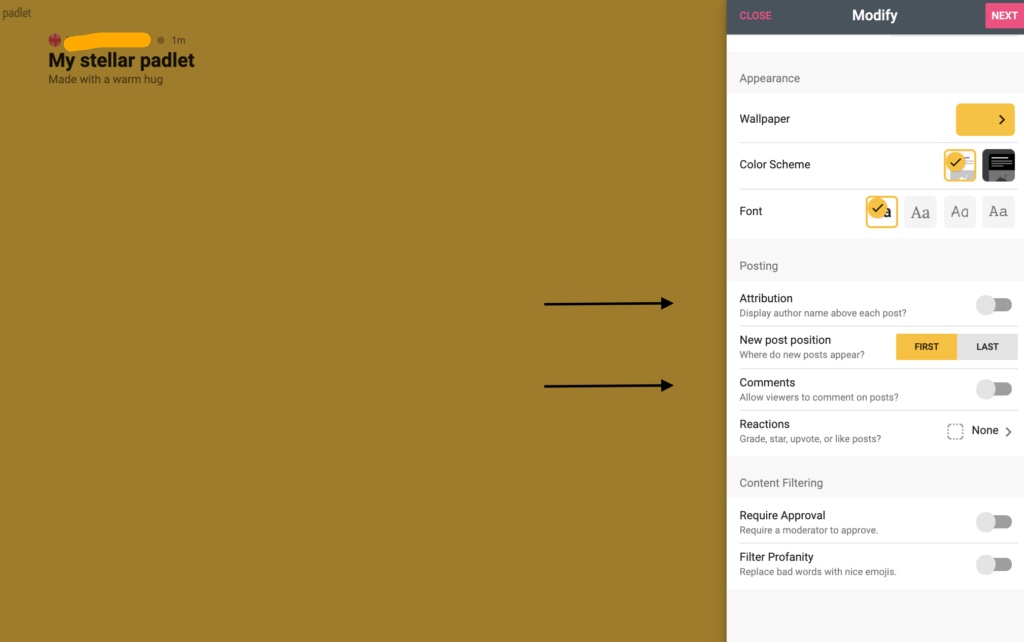
- By toggling “Attribution” under this heading, learners’ names will appear with any comments or questions they post on the board. To create a board that allows for anonymous learner questions about class content, for example, an instructor will want to leave this turned off.
- By toggling “Comments” on, the instructor allows learners to comment on posts and creates a space for discussion on the board. To use it solely to post resources, leave this turned off.
- There are also customisation fields to require a moderator to approve of posts before they appear and to filter profanity which instructors may want to explore to mediate learner contributions to a board used to host discussions.
How to Create a Padlet 6
Once the customisations are set, the instructor will be returned to the board where they can create their first post. Do so by clicking the plus sign that appears on the lower right hand side of the screen.
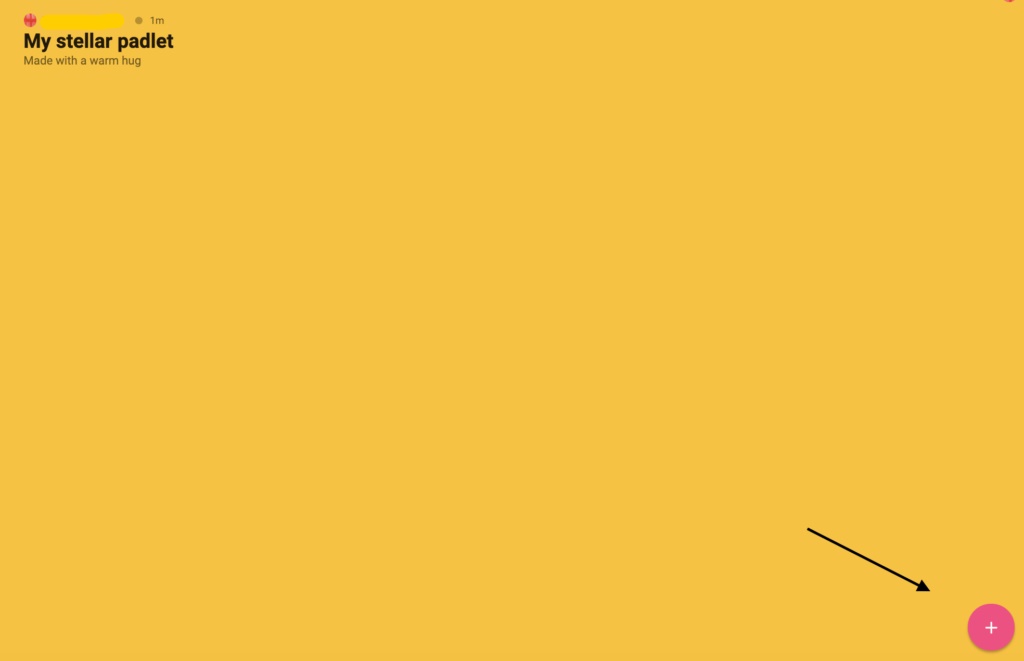
Clicking the plus sign will create a post on the board that an instructor can customise with a title, text, and content shared from numerous sources (file upload, image, link, google search, screencast recording, video, audio, drawings, etc.)
![]()
Embed into the VLE (Moodle)
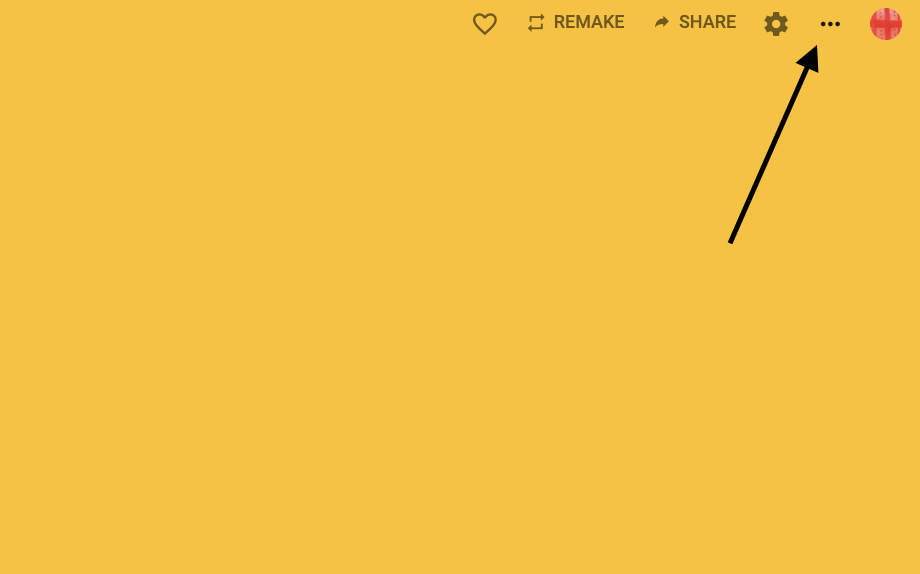
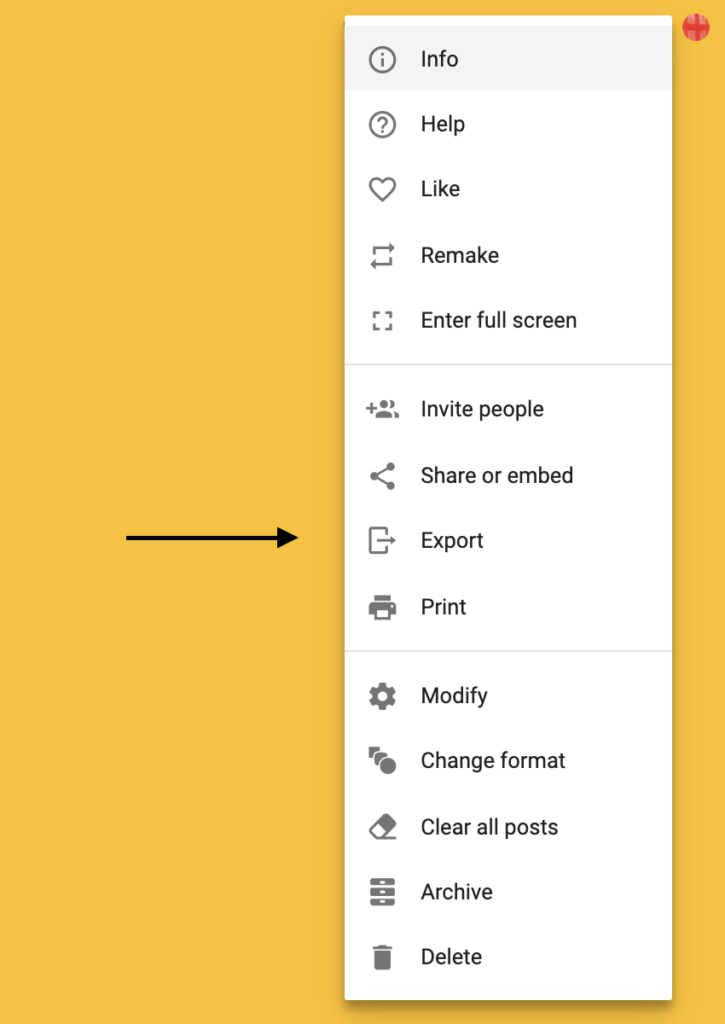
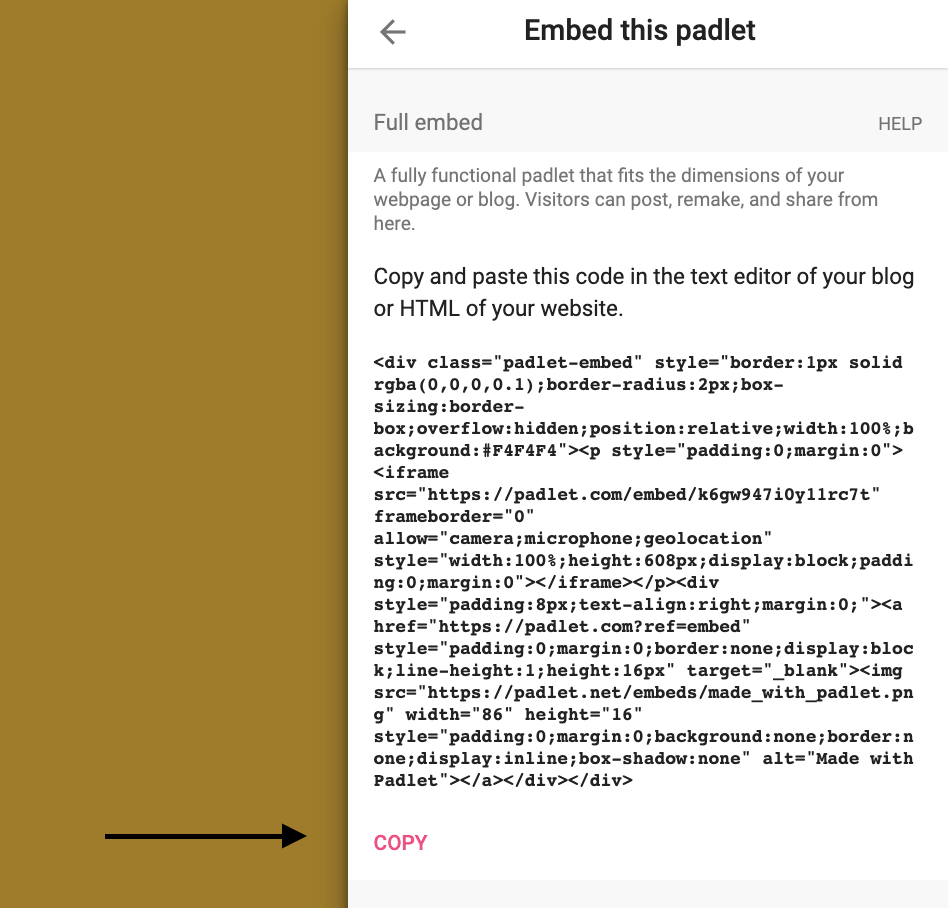
Once set up is complete and the board is ready for learner contributions, the instructor can embed padlet in their Moodle course. To do so, click the three – dot icon in the top right corner. From the dropdown menu, an instructor can see and review privacy settings. Padlet will automatically set the padlet to “secret” which means the padlet will only be visible to those with whom it’s shared. The contributor setting is also set to “can write” which means learners can contribute posts, comment on other posts, but cannot perform any administrative tasks (i.e. deleting a padlet or adding external contributors, for example).
Click “Export” and then “Embed in your blog or your website.” Click “copy” to copy the html code for your board to your clipboard.
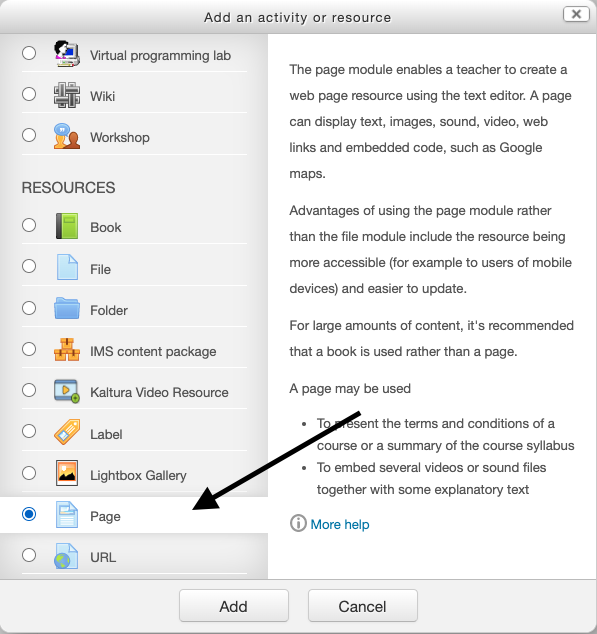
Within your Moodle class, navigate to where you would like your padlet to appear and click “Add an activity or resource.” Select “Page” for best results.
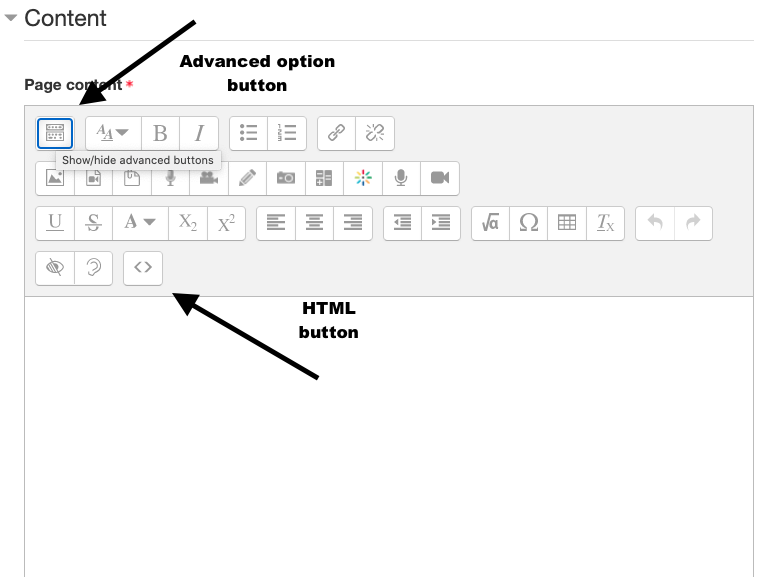
After filling in the “Name” and “Description” fields, scroll down to “Page Content.” Select the “show/hide advanced button” and then the “html” button. Some sample html will appear which you can delete. Paste your padlet html into this box.
Scroll down and click “Save and Return to Course” or “Save and Display”
and your padlet should appear.
Some Uses for Padlet
- Class introductions
- A space to share ideas before class discussion
- A space to collect learner work
- Track prior knowledge of an upcoming topic
- Create mind maps
- Organize group work
- Each group can collaborate in different colour notes so the class can review each group’s contributions and comment.
- White board.
- In class, a padlet can be useful as a space to share links and related content and resources. A class might analyse a shared quotation in common, for example. Users can also draw on the board.
- A post-class reflection space.
- A padlet posted in Moodle can allow learners to reflect throughout the week and ask questions about what they’re learning as they may occur outside a class meeting time. Sample questions used to organize this kind of padlet may include: “what questions do you still have?” “what can I offer more information about?” An instructor can set up the padlet to let learners ask questions anonymously and then answer them throughout the week. Without a pro account, a user is limited to three total padlets. To accommodate this limit, an instructor can download that padlet as a pdf at the end of each week, post it in Moodle, and then delete and repost that padlet to collect new questions the following week.
Any Issues to Consider
- As always, you should consider the security of an external system and GDPR. Don’t ask learners to share personally identifiable data such as addresses, or something that could leave them vulnerable (this goes for any unsupported 3rd party supplier). Padlet has its own Privacy Statement, but you are responsible for the contents of your walls.
- If you have any technical issues, there are user forums available and Padlet has a bank of Help Guides.
- Buddy up; it is useful to add a colleague to your walls and give them administrator rights.